How can we scan documents with an Android phone?

We all need to scan documents at some point, and fortunately we do not need special equipment to do so, and we can do the same with our phones. For this reason, we want to teach you how to scan documents with an Android phone.
The next time you want to scan a form and email it to an individual or organization, or save a business card to your computer, you can go to your smartphone. In this article, we will go to two simple ways to do this, stay with Digito until the end.
Google Drive: Android application scanner
Android does not use the default feature for scanning documents, so the easiest way to do so is to use the Google Drive app. Since this app is installed by default on most Android phones, it can also be considered a default method.


There are also benefits to scanning documents with Google Drive. This program uploads documents to your drive account and you do not need to manually back them up. You can also share them with colleagues, friends or family by sending them a link to the drive.
How to scan documents with the Google Drive app on an Android phone
If this app is not installed by default on your phone, download it via This link Get it from the Play Store. After downloading and installing, download it and log in to your Google Account. It does not matter which tab of the program you are in, you can tap the plus button in the lower right corner of the screen to display the Create New panel. On this page, select the Scan option.
When you first start using Google Drive, you must give it permission to use the camera. Doing so activates the camera and allows you to take a photo of the document. Use the camera interface normally and take a photo of the document or document you want. Common options such as zoom and timer are also visible in this user interface and can be used.
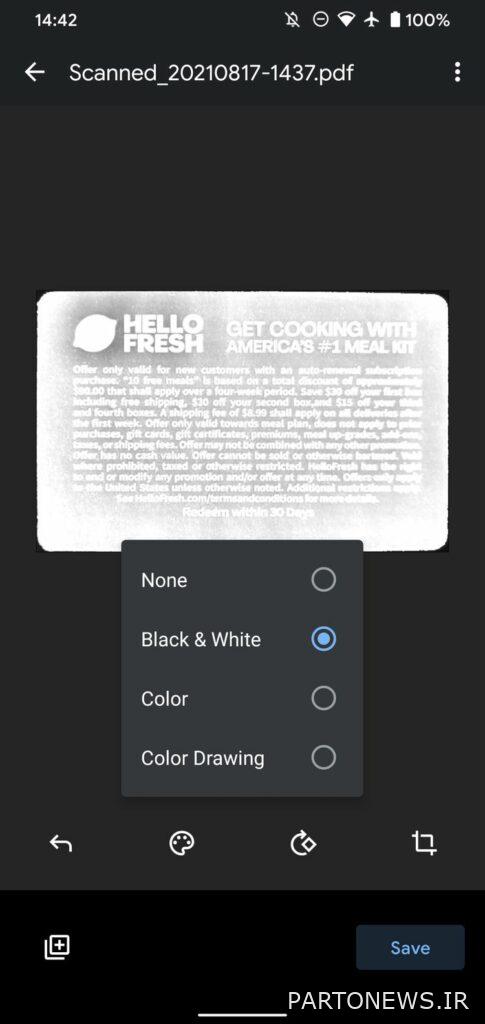
Below is a preview of the photo. If you are not satisfied with the result, tap the Redo button to take the photo again. If you like the result and you are satisfied with it, click the Check button to be able to edit it.
Edit scan with Google Drive
Google Drive has four buttons on the scan page that go from left to right:
- Redo: Tap the arrow icon to re-scan the document. If the result is blurry or has a problem, you can go for this option.
- Color: This option allows you to select 4 image color enhancement tools. The most common are Black & White and Color. Of course, you can try two other options to improve the quality of the scan.
- Rotate: This option rotates your image 90 degrees.
- Crop: Google Drive automatically crop the scanned image to get the subject. However, sometimes the result is not acceptable and you can solve the problems yourself with the cutting tool.
If you want to scan another document, tap the plus icon in the lower left corner of the screen to get a scan of another document. Finally, several other options are available through the three-point menu in the upper right corner of the screen. For example, you can rename the scan file.
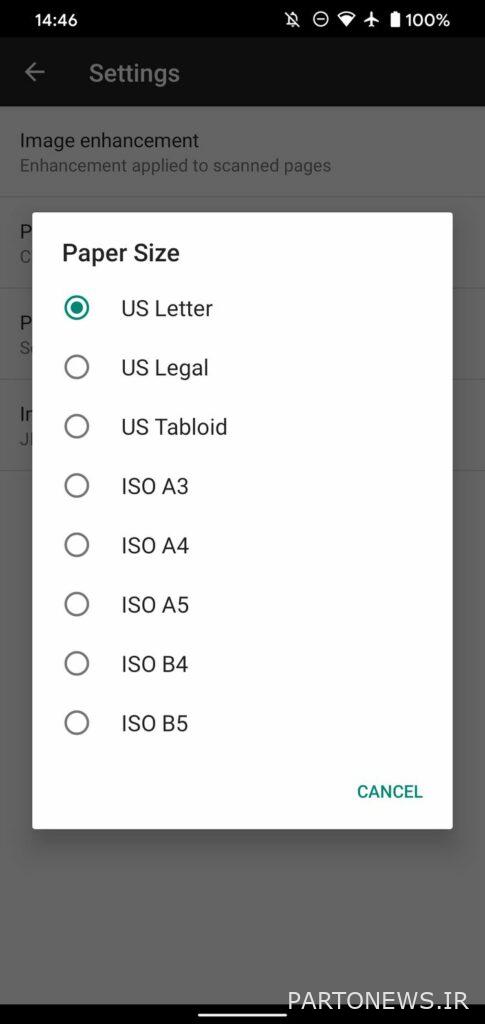
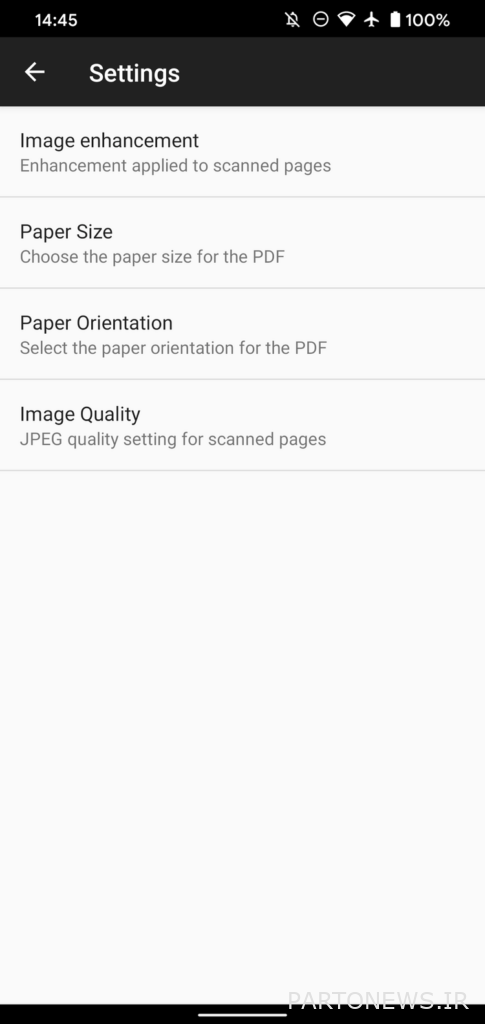
There are several other options in the Settings section that you can also take a look at. Image Enhancement option improves color. Paper Size allows you to change the dimensions of the document, and with the Paper Orientation option you can change it vertically or horizontally, but you can also select the automatic option.
Finally, if you want to increase the quality of the scans, change the Image Quality option. Of course, you can choose lower quality to save storage space.
View and save scanned documents in Google Drive
When you are done, tap Save to return to the home screen. Here you can change the file title. Then select a folder and touch Save to upload it to your folder.
You can then view the file in Google Drive whenever you want. If you want to access this file even when the internet connection is down, tap the three-dot option and select Make available offline. You can also save a copy to your phone memory by touching the download option.
Scan documents on Android with Microsoft Lens
Although scanning documents on Android phones with Google Drive is easy, you may not be interested in this app for any reason or you may not want to use your Google Account. You may also not be interested in uploading all the scans to the cloud.
At this time, to scan documents with an Android phone, you should go to Android scanner programs, one of the best of which is Microsoft Lens. Microsoft Lens is a simple Android scanner that allows you to easily store documents in your phone.
You can download the Microsoft Lens app from This link Get it from the Play Store. When you launch this app, you will be given basic information about it and then it will ask you for permission to access the images and camera. Once such a license has been issued, you can start scanning documents using it.
Microsoft Lens Scanner Mode
Unlike Google Drive, the lens uses several scan modes for various documents, including whiteboards, business cards, actions and photos. In Actions mode, you have several options.
In Action mode, you can use a submenu to select multiple OCR tools:
- Text: Extract text from a photo so you can copy or share it.
- Table: Takes a table of photos.
- Read: Reads the text aloud inside the image.
- Contact: Receives information from the business card and saves it to a contact on your phone.
- QR Code: With this feature you can scan a QR code and open the relevant information. This is not an OCR mode, but is in a subset of the above options.
Record and edit with Microsoft Lens
No matter which mode you use, the scanning method is the same. All you have to do is point the camera at the subject and take a normal photo. For best results, use a contrasting background with the document and hold the phone above it to capture a clear photo.
After shooting with the Microsoft Lens, you can adjust the subject margins if not properly detected. Finally, touch Confirm to see a page with multiple options.
The Add option allows you to add more images to the document. With filters you can change the appearance of the document and you can also cut and rotate the subject. Under the More section, by selecting the Ink option, you can draw on the document.
Save and upload images with the lens
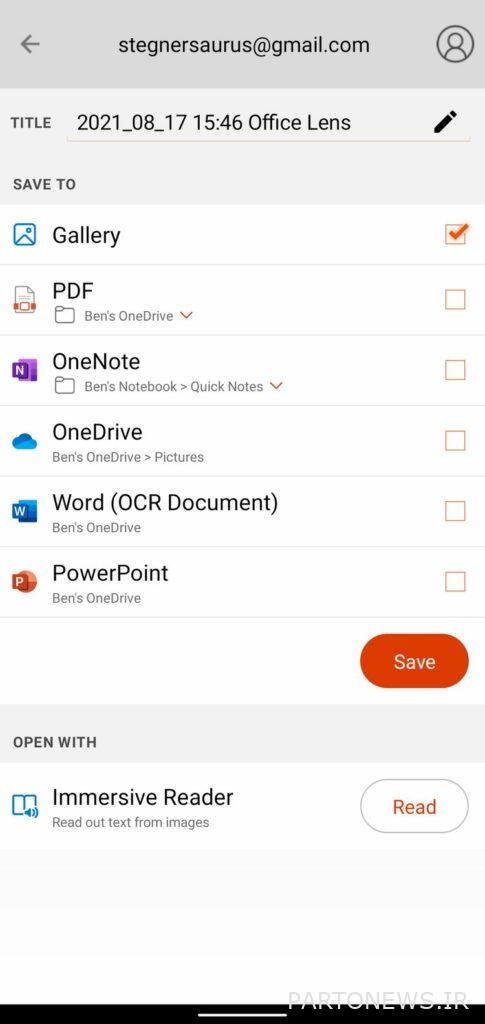
You can now select where to save the scanned file. At the top of the document, set the title and then save it where you want it. By default, your phone’s gallery is selected and the scans are saved as photos.
However, you can save it as a PDF in OneDrive, an OCR document in Input, or other Microsoft apps such as OneNote or PowerPoint. Of course, there is no obligation to do so.
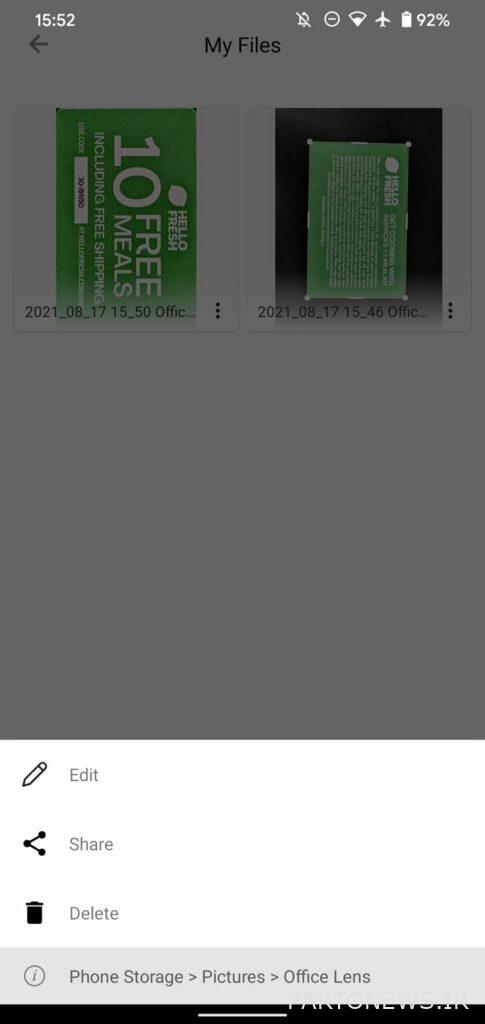
Finally, tap Save to complete the scanning process. You can find the result in the Office Lens folder inside your phone’s gallery app.
The above two simple methods allow you to easily scan documents with your Android phone and you can use your phone as a scanner.